Planting shallots
Posted By: rocket veg Category: Growing Veg, Seasonal AdviceI’ve had an allotment for 15 years and I am ashamed to say that I have never grown shallots – until now. In previous years, I’ve always planted onions, in the autumn so that plants have time to develop over winter, then swell and mature until it’s time to harvest in early summer. The results have been pretty mixed and then last year I realised that most of the onions I harvested were affected by white rot, a nasty unsightly condition which causes mature onions to rot. It’s a soil-borne fungal disease which is very hard to eradicate so it is important to avoid cross-contamination to unaffected growing areas – difficult to manage on allotment sites where crops and tools are shared and people tramp from one plot to another.
Try something new
I have one large patch on my allotment which I am pretty sure is still free from white rot fungus, so rather than planting onions this year, I have decided to grow shallots instead. Growing vegetables is all about the 3 Rs - routine, repetition …and relaxation! It’s easy to get stuck in a groove and find yourself growing the same things year in, year out. After all, if you have success with particular varieties and continue to get good harvests of crops, why change things? So, time for me to do something different and give shallots a go, a bag each of Golden Gourmet and Red Globe bought in our allotment shop and I was ready to go.
Like onions, shallots are best grown from sets which are immature bulbs, treated against disease. You can grow from seed, but sets develop a lot faster and should therefore withstand poor weather and the attentions of pests (lots of these on allotment sites!)
How to plant shallots
In common with most veg planting, thorough soil preparation is key to success. First weed the ground where you are going to plant; then fork in some rich compost or well-rotted manure and add a scattering of organic fertiliser, such as pelleted chicken poo. Rake the surface level and then mark out the rows: 30cm (12”) apart for shallots. I put a short cane at either end and then run a string line between as I like my rows to be arrow straight.
Shallot sets can then be pushed gently into the soil so that the tip is just visible. Each bulb should be 25cm from its neighbours and the soil firmed around it.
Protection from pests
The main threat to the young shallot or onion sets is from birds – pigeons in particular – which seem to be attracted to the tip of the bulb which they then pull from the soil. Maybe they mistake the tip for a worm. The obvious solution is to cover the rows of shallots with fleece which will also provide protection from the worst of the weather over the coming weeks. I have some long wire mesh cages which I place over the rows, thereby keeping birds away. Once the shallots put on growth, protection can be removed and the plants left to their own devices.
Aftercare
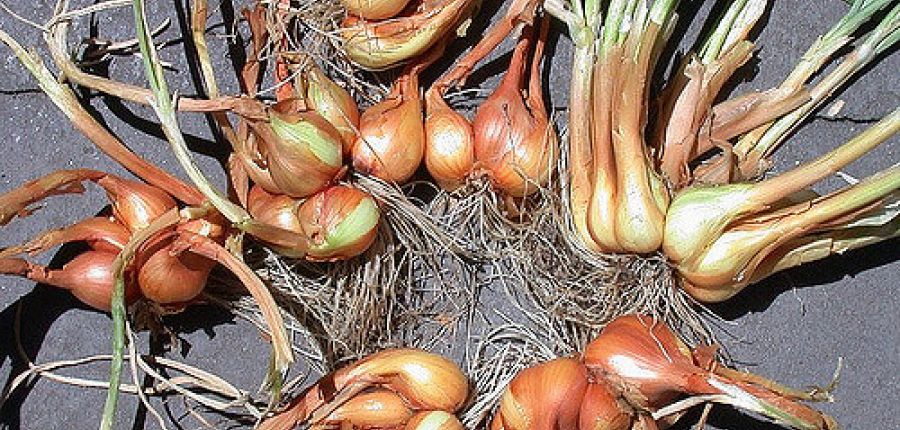
Left to grow, weeds will encroach on your shallots and stunt their development, so try to keep the plants free from weeds. A short handled hoe really comes into its own for this task enabling you to clear the soil close to the developing clump of bulbs. Shallots can be harvested in mid-summer, each clump separated and the bulbs dried before storing in a cool, dry place. Shallots have a mild, distinctive flavour and can be used in a variety of dishes. They also pickle well.


